Wednesday, March 26, 2014

Spring 2014 update


Well it has been some time since I updated our farm's blog. That is probably because I lived in another country for almost 2 years and just recently returned. I am glad to be back for a short visit and in my time back have had a chance to work on a few projects and document the progress of others. So here we go...

About 6 years ago we decided to turn a bedroom into a living room by knocking out the wall between the bedroom and our then living/dining room. There were two doors in this room then, one that was the entrance to the room and the other which was a closet. The closet was turned into a pantry and both of these opening were sealed. 


Here is a sample of how the drywall looked for the last few years. Michael is really good at getting things to the point of functioning, and then quickly looses interest for another project. So things tend to look 'unfinished' for quite a while. 

In this photo you can see where we closed the door and closet of a bedroom after we opened it up into our main living space. I hung photos that I had waiting to be displayed over the wall
Here is the wall after texturing. Great improvement. 

Then painted.

When the wall was finished, I purchased more frames to make a larger collage. 
In the week before, while I was done studying for my board exams, my mom came up and helped me paint our bathroom. 

Here is what it looked like before. 


And after...

There will be a door on this to make a small closet (all things take time)


I don't have a picture of the vanity before but just picture the two towers gone and a large ugly medicine cabinet instead of the mirror. Much improved now with more storage. 

 Then to move outside. Just before I left we had done some major work outside, residing our entire house, staining it, building the entryway, building a rock retaining wall and sprucing up our side yard.


Here is a single image to realize the drastic change.
Before. Notice plastic siding, single door, no porch, many dead trees, no grass, etc. Pretty shabby.


And the same house 8 years later. WOW!

Don't mind the next project under the tarp on the right. :)


In progress. Those are the rock pallets that we used to build the rock wall.
Here is the rock wall the day that we built it. Notice the lack of grass.

Beginnings of the planter boxes


(Mostly) Done. You can see the rock wall in the following pictures.


Look at all that grass!!!


Three planters for veggies.


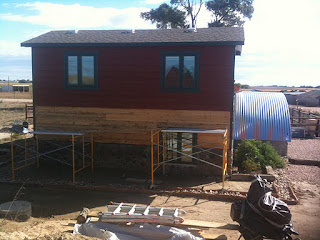
That 'stick' looking object by the window is the window sill (not installed)


Our fabulous sunset hill.


Here is the property from the street.  


 Well, hope you enjoyed the update.


Tuesday, October 11, 2011

Front entryway addition

Although it is not yet fully complete we have gotten about 70% of the front entryway installed! Yay!! Incase you were not aware, the entry way is made of 1/4 of a grain-bin, which was the clever idea of Michael.

Now for those of you that do not live in the middle of nowhere where the wind blows and the snow blows and the rain blows, you may not appreciate the significance of this structure, but for us prairie folk, this entryway cover is going to be a game changer. No longer will we be assaulted by weather exiting our house (we will have a chance to slowly adjust to it in the covered entryway.) No longer will we have to bring our muddy pawed friends into the kitchen to wash their feet off. Our muddy boots will not have to live in the kitchen, and track mud all over the main living space on the way to their home. Rain will not drip onto our beautiful door and destroy it. Now we will have to wait and see how badly the snow drifts into the corner of the entryway (my guess is that it will be substantial.)


For now though I am enjoying my new decorating space!


You can see that we have not yet installed the corner post. This is due to the fact that we need to pour concrete for the screened in porch that will be on the east side of the house (next year project). The post, however, is all ready to install- just need the concrete first.


In other news the staining is getting closer; the photo below shows where I am as of today. I should make substantial progress and maybe even finish staining by the end of this week.


Tata for now.

Kymberlee

Monday, October 3, 2011

Farm Progress August/September 2011

So the last time I updated about the farm construction (which was actually the only time) the siding had not been finished, the staining was not yet started and the front entry was a long way from getting started. Well today, the siding is completed (mostly), the shingles are up on the south sid
e, the staining is about half way done (I think it will be done by the close of next weekend), and the front entryway is really getting going. So lets cut to the pictures.


Lets just recap where we started. Here is the house in 2006. Nice right.


Fast forward through new siding, insulation, stone trim, new door configuration, new windows, etc.

And here was my rendition of what the house would look like with the stain.


And here is the house with the stain. Pretty close with the colors. You can also see the cinderblock wall built to support the front entry as well as a template of the arch of the roofing.

Also in this picture you can see the hook that I put up and the wreath that I made for the fall.


And here is the siding completed on the west wall. I
am pretty proud of this wall because I sided it myself (with the fantastic assistance of Hanna's SO)


And here is a mock fit of the grain bin roofing.


Back to this wall. Here is the wall yesterday morning. We finished adhering the lathe to the blocks using a cement like composite.


Then added a layer of mortar. Also you can see the bracket on the far side (black object attached at the top. Ill get a better picture later) Plus test fitting the top cap stone.


Then we moved on to routing a notch in the wall to accept the roofing. This turned into a difficult task that went less than perfect, but it will work. We still have to notch the top by hand where the router would fit, which will hopefully happen today.


Good picture of the craftsman!


Stay tuned for the progress made over the next week!


Thursday, August 11, 2011

Meadowlark Fledgling

Two days ago I heard a young bird crying. I spotted the bird on the ground, and watched as it moved from the front yard to the back pasture and back screaming its head off. After a few hours I decided that mom was not around, and was made certain of this fact when the fledgling came running up to me with its mouth open (it even ran up the the dog asking for a meal). My heart strings were tugged hard enough, and soon the bird and I were off to the vet clinic where I used to work to get a baby bird powder. The dog came with us and was, as usual, very well behaved leaving the bird alone.

I got a small cage and the food and headed back home. The bird did well all day, although it does not like the powdered diet. I tucked him into my veggie garden for the night and went to bed. The next morning he came peeping up to me when I went outside. I fed and watered the little thing, and then went about my day staining the house. A few hours later I looked behind me to see the dog with the bird in its mouth.

Devastated, I rushed over to find a very sad looking bird and a very guilty dog. The bird was alive, and after a bit of debate and a lot of tears I decided that I had seen birds look worse and do fine so I decided to give the bird until the end of the day to perk up. Lots of TLC later and the baby bird was eating grasshoppers that had been caught, de-legged, and finger fed by me. The bird was allowed to sleep in the house in his cage, which I outfitted with a handmade nest, and woke up chipper and chirping to be fed at 7am.

I was reluctant to write about the baby, incase it did not survive being mauled by the dog, but I feel confident today that he will make it to adulthood just fine.

So a little introduction is in order.


This is the little guy (or girl). It is a meadowlark fledgling not a nestling. The difference between the two life stages can be determined by whether or not the bird can perch, which this kiddo can (although he prefers not to). He eats more than a teenage football team after practice- about three 1-1.5 inch grasshoppers every 20-30 min plus all the house-flies we can kill (Michael has been making a pile for me every few hours). Luckily there is no shortage of hoppers around here these days so I don't have to try very hard to catch him some food. He can fly down from a tree, but not up, and he likes to hop around in the grass. He is starting to groom and has his baby chirp plus a modified chirp that he does if he is really riled up.


Anyways, always fun on the farm.


Tuesday, August 9, 2011

Grasshopper Plague of 2011

Its official. We have been suffering from ridiculous numbers of grasshoppers for the entire summer, and finally yesterday the hoppers made the local news.

Now I am not talking just a few hoppers. I am talking roughly 20 per foot or MORE around most of our 5 acres. Its crazy. Our garden is completely destroyed- only tomatoes are left now, and they are eying those too. I have sprayed three times and I am thinking I might need to spray again tonight or tomorrow.

Maybe we can start harvesting the hoppers and frying them up. Make hopper candy or something useful...